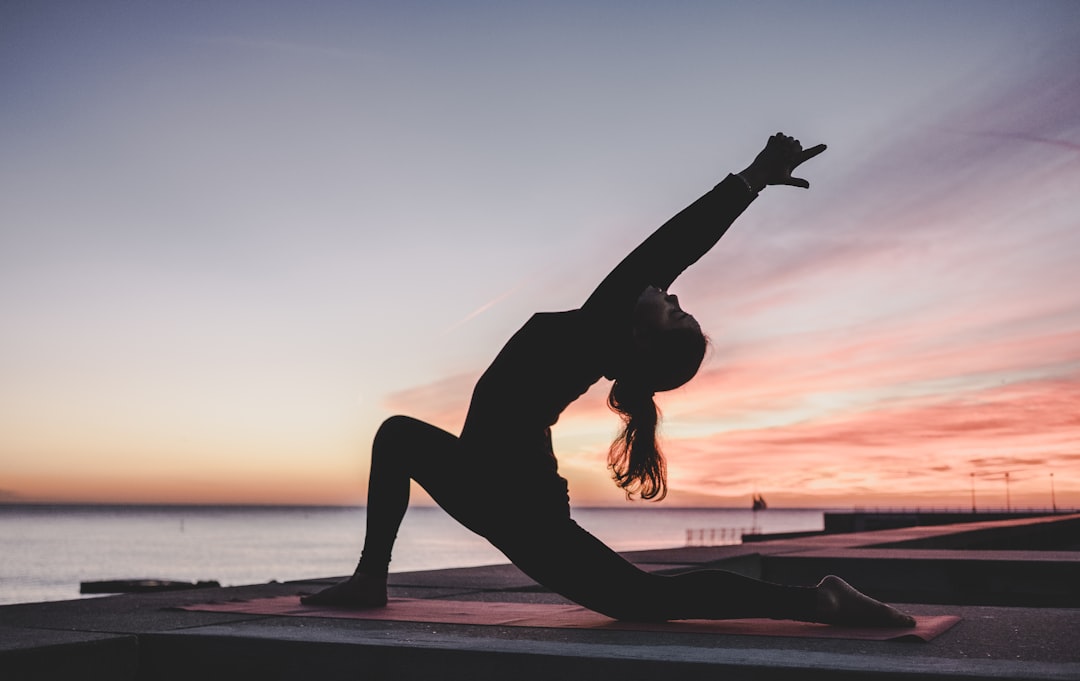
Back pain can feel like a persistent, game-breaking debuff, draining your stamina and locking you out of high-level activities. Whether it’s from marathon gaming sessions, a sedentary job, or an old injury, this recurring boss battle can seriously impact your performance. This guide is your tactical playbook, providing the best yoga poses for back pain to help you counter the negative effects, restore your mobility, and get back to the main quest of your life. We’ll break down the mechanics of each pose, giving you the step-by-step strategy to achieve victory over discomfort.
Pre-Game Prep: Your Tactical Loadout for Back Pain Relief
Before jumping into the core strategy, you need to complete the tutorial phase. Proper preparation ensures you execute each move safely and effectively, preventing further setbacks. Think of this as checking your gear and reading the mission briefing before engaging the enemy.
Understanding the Boss: Types of Back Pain
Not all back pain is the same enemy. The most common type is mechanical pain, often stemming from poor posture—a frequent side effect of long hours in a gaming chair. This can manifest as muscle strain (acute pain) or wear-and-tear on spinal discs over time (chronic pain).
Understanding whether your pain is a temporary muscle strain or a more persistent issue is crucial. This guide focuses on general, non-specific back pain. If you’re experiencing sharp, radiating pain, numbness, or pain from a specific injury, your mission briefing must include a consultation with a healthcare professional.
Essential Gear: What You Need Before You Start
Your loadout for this mission is simple, but each piece is critical for success. You don’t need epic-level gear, just the right tools for the job.
- Yoga Mat: This is your primary arena. A non-slip surface provides the stability and cushioning needed to execute poses correctly.
- Comfortable Clothing: Equip gear that allows for a full range of motion. You don’t want your armor to restrict your movement during a critical phase.
- Optional Power-Ups (Yoga Blocks/Strap): These items can act as support, helping you achieve the proper form in a pose if your flexibility is still in the early levels. They make the poses more accessible and prevent overstraining.
The Golden Rule: Consult Your Healer (Doctor)
This is the most critical prerequisite. Before beginning any new exercise regimen for pain, consult a doctor or physical therapist. They can diagnose the specific cause of your pain and confirm which movements are safe for your condition. Consider this guide a meta-strategy; your doctor provides the personalized patch notes for your unique situation.
The Core Strategy: The Best Yoga Poses for Back Pain
Here is the step-by-step walkthrough for the most effective poses to counter back pain. Each pose targets specific mechanics, from spinal decompression to muscle lengthening. Execute them with precision and focus on your breathing—your primary resource pool.
Phase 1: The Warm-Up – Cat-Cow Pose (Marjaryasana-Bitilasana)
Objective: To initiate spinal mobilization and gently warm up the muscles supporting the back. This is the perfect opening move to prepare for more complex strategies.
Preparation: Position yourself on your hands and knees in a tabletop position. Ensure your wrists are stacked directly under your shoulders and your knees are under your hips. Your back should be flat, like a stable platform.
The Strategy: Step-by-Step Execution
- Cow Pose (Inhale): As you inhale, drop your belly towards the mat. Lift your chin and chest, and gaze forward. Broaden across your shoulder blades and draw your shoulders away from your ears. This creates a gentle arch in your spine.
- Cat Pose (Exhale): As you exhale, press the floor away and round your spine toward the ceiling, like a cat stretching. Release your head toward the floor—don’t force your chin to your chest. Feel the stretch between your shoulder blades.
- Repeat: Continue flowing between Cat and Cow for 8-10 breath cycles. The movement should be slow and deliberate, synchronized with your breath.
Why It Works: Cat-Cow acts as a dynamic duo, moving the spine through both flexion (rounding) and extension (arching). This movement increases blood flow to the discs between your vertebrae, relieving stiffness and improving the spine’s overall health and flexibility. It’s a low-risk, high-reward opener.
Phase 2: Strategic Retreat – Child’s Pose (Balasana)
Objective: To actively lengthen and decompress the entire spine, providing a gentle stretch for the lower back, hips, and thighs. This is your “safe zone” pose, perfect for resting between more active phases.
Preparation: From your tabletop position, bring your big toes to touch and spread your knees as wide as is comfortable (or keep them together for a different sensation).
The Strategy: Step-by-Step Execution
- Exhale and Fold: On an exhale, sit your hips back toward your heels.
- Extend and Rest: Walk your hands forward, lowering your torso between your thighs. Rest your forehead gently on the floor. Your arms can be extended forward or resting alongside your body with palms facing up.
- Breathe and Hold: Hold this pose for at least 30 seconds, or up to a few minutes. Focus on breathing deeply into the back of your body, feeling the expansion and release with each breath cycle.
Why It Works: Child’s Pose gently stretches the latissimus dorsi (a large back muscle) and elongates the lumbar spine. By allowing your torso to rest fully, you release tension held in the back muscles, calming the nervous system and providing significant relief.
Phase 3: Counter-Attack the Slouch – Sphinx Pose (Salamba Bhujangasana)
Objective: To build strength in the spinal erector muscles and provide a gentle backbend that counteracts the forward-hunching posture common from sitting.
Preparation: Lie on your stomach with your legs extended behind you, hip-width apart. Place your forearms on the floor, parallel to each other, with your elbows directly under your shoulders.
The Strategy: Step-by-Step Execution
- Engage Your Foundation: Press firmly through your palms and the tops of your feet. Engage your thigh muscles slightly to protect your lower back.
- Lift Your Chest: On an inhale, gently lift your head and chest off the floor, creating a mild backbend. Keep your gaze forward.
- Maintain Form: Keep your shoulders relaxed and away from your ears. Press your pubic bone gently into the floor to maintain length in the lower back. Avoid collapsing into your shoulders.
- Hold and Breathe: Hold for 30-60 seconds, breathing steadily. To release, gently lower your chest and head back to the floor.
Why It Works: Sphinx Pose is a safe and accessible backbend. It strengthens the muscles that support the natural curve of your spine while gently stretching the abdominal muscles. This helps to correct postural imbalances that are a primary cause of back pain.
Phase 4: Rotational Maneuver – Supine Spinal Twist (Supta Matsyendrasana)
Objective: To increase spinal mobility, stretch the glutes and piriformis muscle, and release tension in the lower back.
Preparation: Lie on your back. Draw your right knee into your chest, giving it a gentle hug. Extend your left leg long onto the mat.
The Strategy: Step-by-Step Execution
- Initiate the Twist: Extend your right arm out to the side at shoulder height, palm facing down. Place your left hand on the outside of your right knee.
- Guide the Knee Across: On an exhale, gently guide your right knee across your body toward the left side of the mat.
- Maintain Shoulder Contact: The goal is to keep both shoulders grounded on the floor. It’s more important than getting your knee to the ground. This anchors the twist in your spine.
- Adjust Your Gaze: Turn your head to look over your right shoulder, if it feels comfortable for your neck.
- Hold and Repeat: Hold for 30-60 seconds. To release, gently roll back to center, hug both knees into your chest to reset your spine, and then repeat on the other side.
Why It Works: This twist lengthens the muscles along the side of the spine and the outer hip. Releasing tension in these areas, particularly the glutes and piriformis, can alleviate pressure on the sciatic nerve and reduce lower back pain.
Phase 5: Full System Reset – Downward-Facing Dog (Adho Mukha Svanasana)
Objective: To create full-body traction, decompressing and lengthening the entire spine while also stretching the hamstrings and shoulders.
Preparation: Start in a tabletop position on your hands and knees.
The Strategy: Step-by-Step Execution
- Set Your Foundation: Spread your fingers wide and press firmly through your palms. Tuck your toes under.
- Lift Your Hips: On an exhale, lift your knees off the floor and send your hips up and back, forming an inverted “V” shape with your body.
- Prioritize a Straight Spine: The most important mechanic here is a long, straight spine. Keep a generous bend in your knees to allow your tailbone to reach toward the ceiling. Do not sacrifice a long spine for straight legs.
- Engage and Hold: Let your head hang freely between your upper arms. Press the floor away from you. You can gently “pedal” your feet, bending one knee and then the other, to warm up your hamstrings.
- Hold: Stay in the pose for 5-8 deep breaths.
Why It Works: Downward-Facing Dog is a mild inversion that uses gravity to create space between the vertebrae. Critically, it also stretches the hamstrings. Tight hamstrings pull on the pelvis, which can flatten the natural curve of the lower back and lead to chronic pain.
Advanced Tactics: Yoga Poses to Avoid with Back Pain
Just as in any game, some moves are high-risk and should only be attempted by high-level players or avoided entirely during specific missions. When dealing with an active back pain “debuff,” certain poses can do more harm than good.
High-Risk Maneuvers and Why to Avoid Them
- Deep Forward Folds (e.g., Standing Forward Bend with Straight Legs): While it seems intuitive to stretch the back this way, forcing a deep fold with straight legs can put immense pressure on the lumbar discs and overstretch already strained muscles.
- Intense Backbends (e.g., Wheel Pose, Camel Pose): These require significant spinal strength and flexibility. Attempting them without proper conditioning can compress the vertebrae and exacerbate pain. Stick to gentle backbends like Sphinx or Cobra.
- Unsupported Twists (e.g., Seated Spinal Twist without proper alignment): Twists are beneficial, but forcing them or using momentum can torque the spine in a harmful way. Always lead with length before you twist.
The Long Game: Building a Sustainable Back Health Meta
Defeating back pain isn’t a single boss fight; it’s a long-term campaign. The best strategy to win at a game like chronic pain management is consistency and a holistic approach. These poses are your core abilities, but how you use them daily determines your success.
Consistency is Key: Building Your Daily Practice
Performing a short, 10-15 minute routine of these poses daily is far more effective than one long session per week. This consistent practice maintains spinal mobility, reduces muscle tension, and builds the core strength necessary to support your back. Think of it as completing your daily quests to earn long-term rewards.
Beyond the Mat: Optimizing Your Gamer Station
Your environment can constantly re-apply the back pain debuff. Optimize your setup to support your spine:
- Ergonomic Chair: Ensure your chair has proper lumbar support. Your feet should be flat on the floor, and your knees should be at a 90-degree angle.
- Monitor Height: The top of your monitor should be at or slightly below eye level to prevent neck and upper back strain.
- Scheduled Breaks: Use a timer to remind yourself to stand up, stretch, and walk around for a few minutes every hour. Break the long sessions to prevent muscles from locking up.
FAQ: Your Post-Mission Debriefing
Here are answers to some common intel requests from the field.
-
1. How often should I do these yoga poses for my back pain?
-
For optimal results, aim for consistency. A short session of 10-20 minutes daily is more beneficial than a single, long session once a week. This regular practice helps to maintain flexibility, build supportive strength, and prevent the recurrence of stiffness. Listen to your body; on days when the pain is more acute, stick to the most gentle poses like Child’s Pose and Cat-Cow.
-
2. Can yoga make my back pain worse?
-
Yes, if performed incorrectly or if you choose the wrong poses for your specific condition. This is why the pre-mission briefing with a doctor is crucial. Avoid any pose that causes sharp or shooting pain. The mantra is “challenge, not pain.” Pushing through sharp pain is a losing strategy that can lead to further injury. Stick to the foundational poses listed here and prioritize proper form over depth.
-
3. Is hot yoga a good strategy for dealing with back pain?
-
It can be, but it requires caution. The heat in hot yoga can make muscles more pliable, potentially allowing for a deeper stretch and increased blood flow, which can be soothing. However, the heat can also create a false sense of flexibility, leading players to push past their safe range of motion and risk injury. If you are new to yoga or have significant back issues, it’s best to master the poses in a non-heated environment first.
-
4. How long until I see results from these yoga poses?
-
The timeline for results varies depending on the player and the severity of the “debuff.” Some people feel immediate relief from tension after just one session, especially with poses like Child’s Pose. For more chronic issues, noticeable and lasting improvement may take several weeks of consistent practice. The goal is long-term victory, not a temporary power-up. Track your progress and celebrate small wins in mobility and pain reduction.
Conclusion
You now have the tactical playbook to combat one of the most common and frustrating opponents: back pain. By incorporating these yoga poses into your routine, you are not just treating a symptom; you are building a stronger, more resilient character. This isn’t a quick fix, but a sustainable strategy for long-term health and performance. You have the guide and the proven tactics. Now, execute the plan, defeat the level, and claim your victory over pain.
Be sure to comment below if this article helped you!
Leave a Reply